Scan for the latest vulnerabilities using Nessus and download detailed vulnerability reports in HTML and CSV format with Nessus Add-on for Sn1per Professional!
Features
- Integrate with Nessus to scan for the latest CVE’s and vulnerabilities
- Download detailed vulnerability reports in HTML and CSV format.
- Import all vulnerabilities into Sn1per Professional
Requirements
This add-on requires a Sn1per Professional or Sn1per Enterprise license along with the following components:
- Nessus v10.x
This assumes that you already have a working Nessus installation running the latest version (10.x). If not, you can obtain a free Nessus license from https://www.tenable.com/downloads/nessus?loginAttempted=true
Installation
After Nessus is installed, follow the steps below:
- Run
/etc/init.d/nessusd startto start the Nessus service - Open a new browser window and go to: https://127.0.0.1:8834/#/ and login to confirm your Nessus installation
Configuration
Modify an existing configuration template under the /sniper/conf/ directory (ie. /usr/share/sniper/conf/vulnscan_only) and add your Nessus IP, username and password to the appropriate fields seen below.
NOTE: You can also create a copy of an existing template you want to use and modify that template to configure your scan as well (see here for details on creating dynamic configuration templates):
# NESSUS CONFIG
VULNSCAN="1"
NESSUS="1"
NESSUS_HOST="127.0.0.1:8834"
NESSUS_USERNAME="admin"
NESSUS_PASSWORD='your_password_here'
NESSUS_POLICY_ID="c3cbcd46-329f-a9ed-1077-554f8c2af33d0d44f09d736969bf" #DEFAULT POLICY
Selecting A Scan Policy
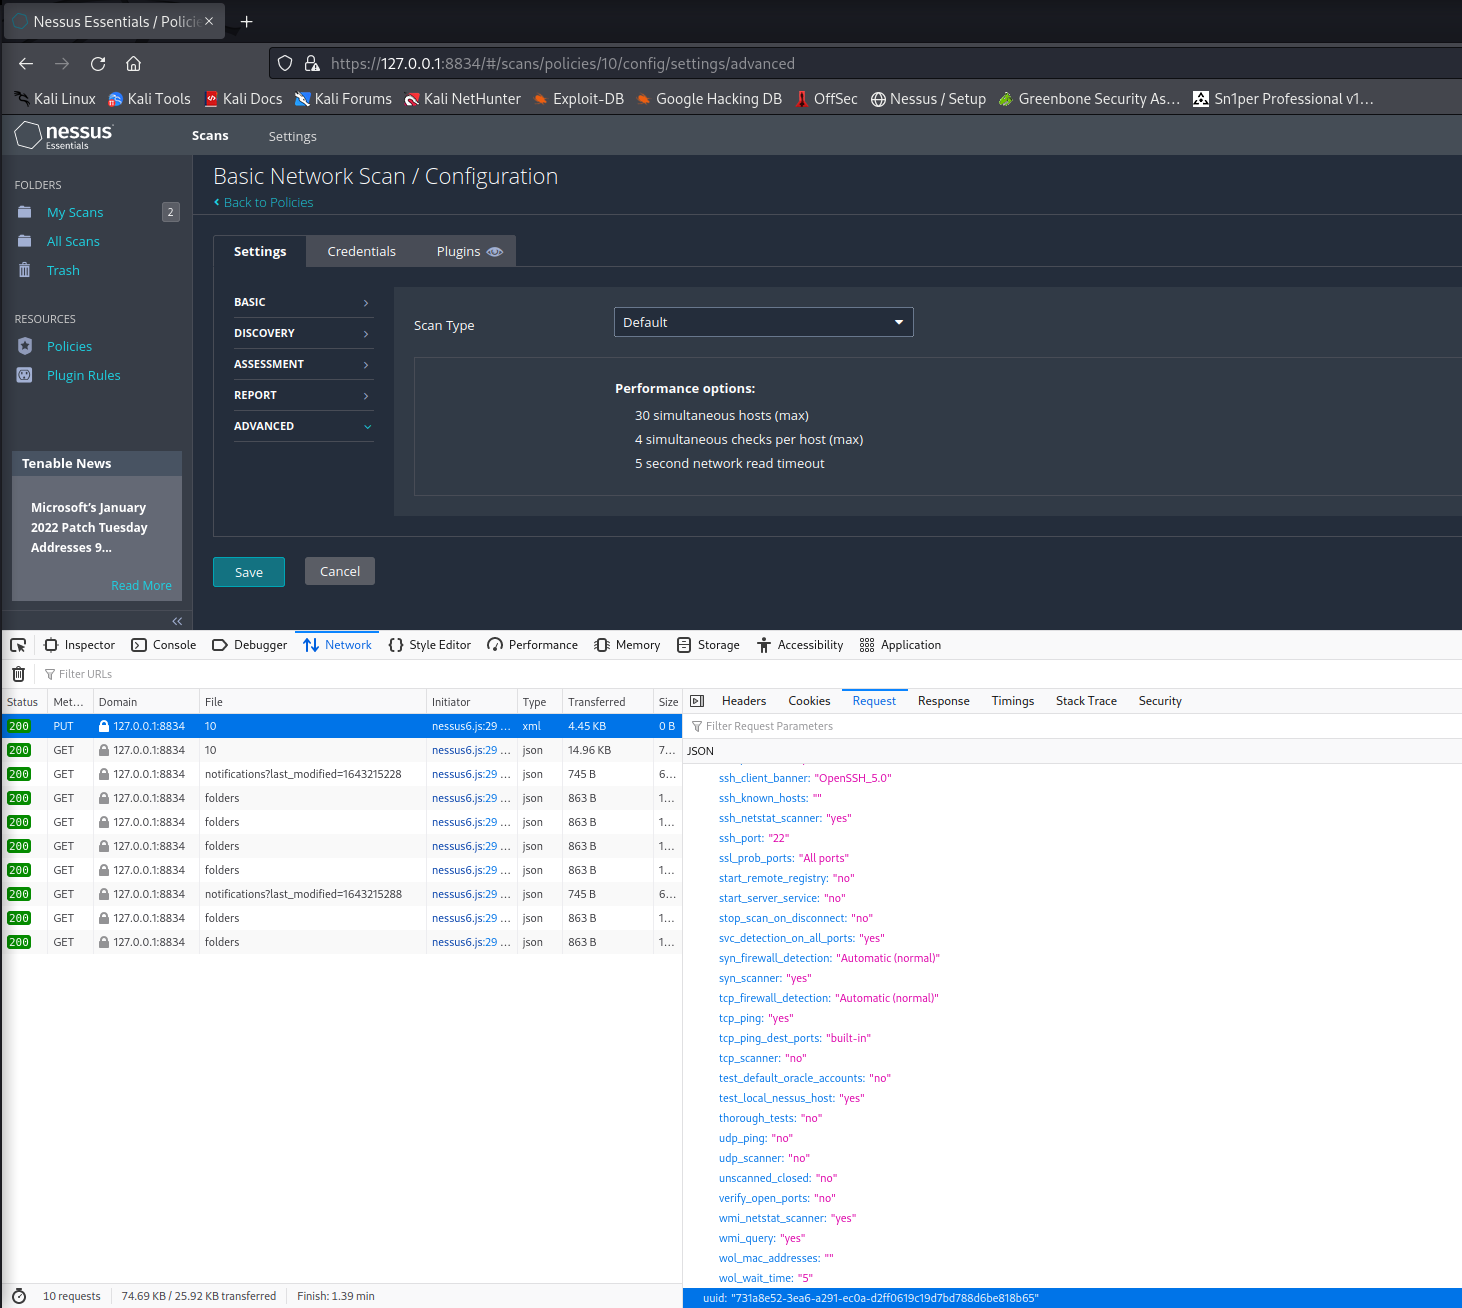
To select a different scan policy to use for the scan, you will need to use web developer tools while accessing the Nessus web UI. To do this, click the “Policies” menu and click on the policy you want to use for Sn1per scans and click “Save”. Under the “Network” tab in web developer tools, you will see a “PUT” request with the UUID of the policy on the request body. You will need to update your Sn1per conf NESSUS_POLICY_ID setting with this value prior to running the scan.
Running scans
Run a test vuln scan to confirm your installation:
sniper -t <target> -c <full_path_to_your_sn1per_custom_conf> -m normal -w <workspace_name>NOTE: This can also be done using the Command Execution Add-on from the web UI.
Reporting
After the scan(s) complete, results will be shown in the workspace report view under the “Vulnerabilities” section and from the host report as well as the “Vulnerability Report Viewer“.
Demo