In this blog post, I will outline the steps needed in order to automate Dynamic Application Security Testing (DAST) using Sn1per Professional. For those unfamiliar with DAST, it is the process of analyzing dynamic web content in order to find vulnerabilities. There are several tools on the market to accomplish this, but we’ll focus on the top tools used by Sn1per Professional in this blog post.
Getting Started
To get started, we’ll need a test target or website we want to scan. For the purposes of this blog, I’ll be using http://altoro.testfire.net/ (Disclaimer! Be sure you have permission to perform vulnerability scans on the target selected!).
Next, we’ll need a copy of Sn1per Professional installed along with a licensed copy of Burpsuite Professional 2.x which can be purchased from PortSwigger. We will also need the latest OWASP ZAP version installed locally on our Sn1per Professional instance along with Arachni.
Configuration
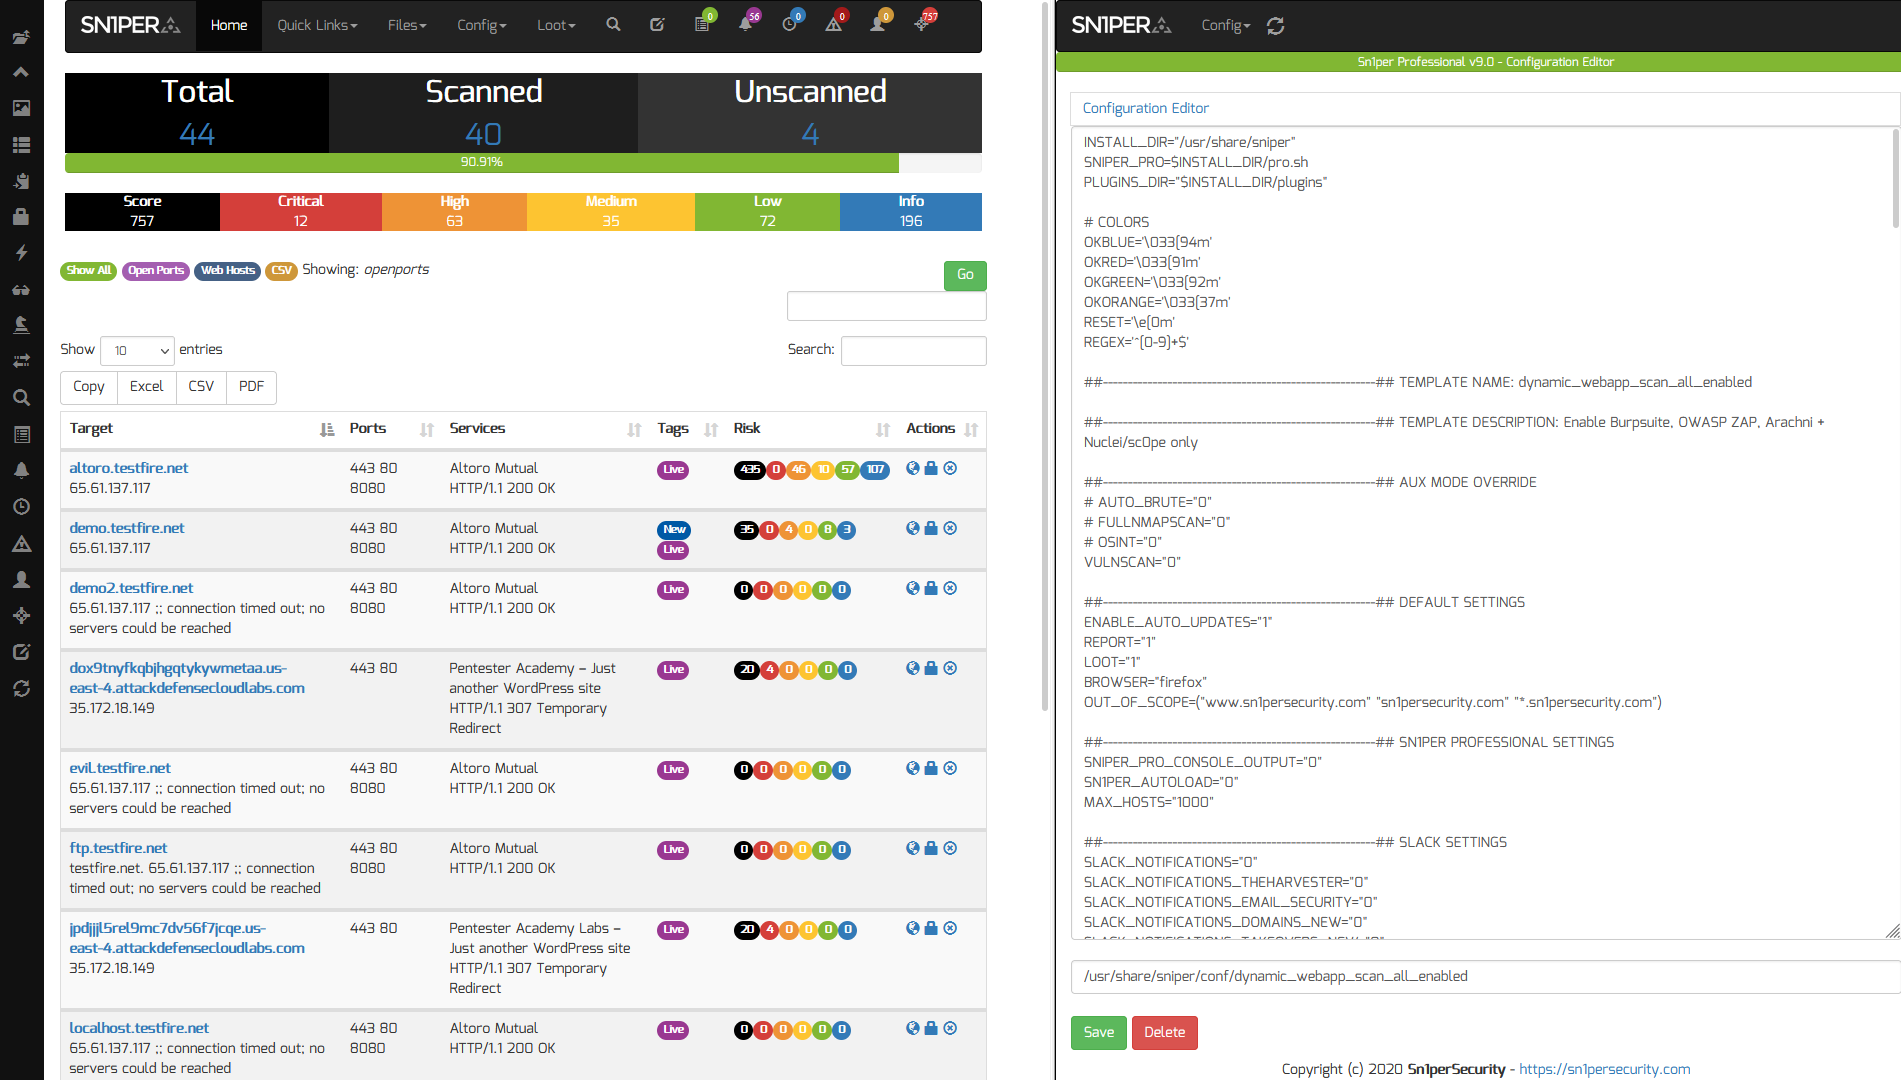
Now that we have all the required tools installed, we’ll need to configure Sn1per Professional in order to initiate scans and import the results. To do this, we will need to follow the integration guides for Burpsuite Professional and the OWASP ZAP. Since Arachni is already installed with Sn1per and does not require special configuration, the only change required is to set ARACHNI=”1″ in our /root/.sniper.conf prior to running the scan. To make this easier, you can also use the Sn1per Professional web UI to configure your scan profiles by selecting and editing the configuration templates from the “Config” menu.
Running The Scan
Now that we’ve installed all required tools and configured our scans, the next thing we need to do is run our scan. This is done from the Sn1per Professional web UI by using the “Quick Commands” section of the report. We will also need to select the configuration template we created in the previous step from the “Config” drop down menu.
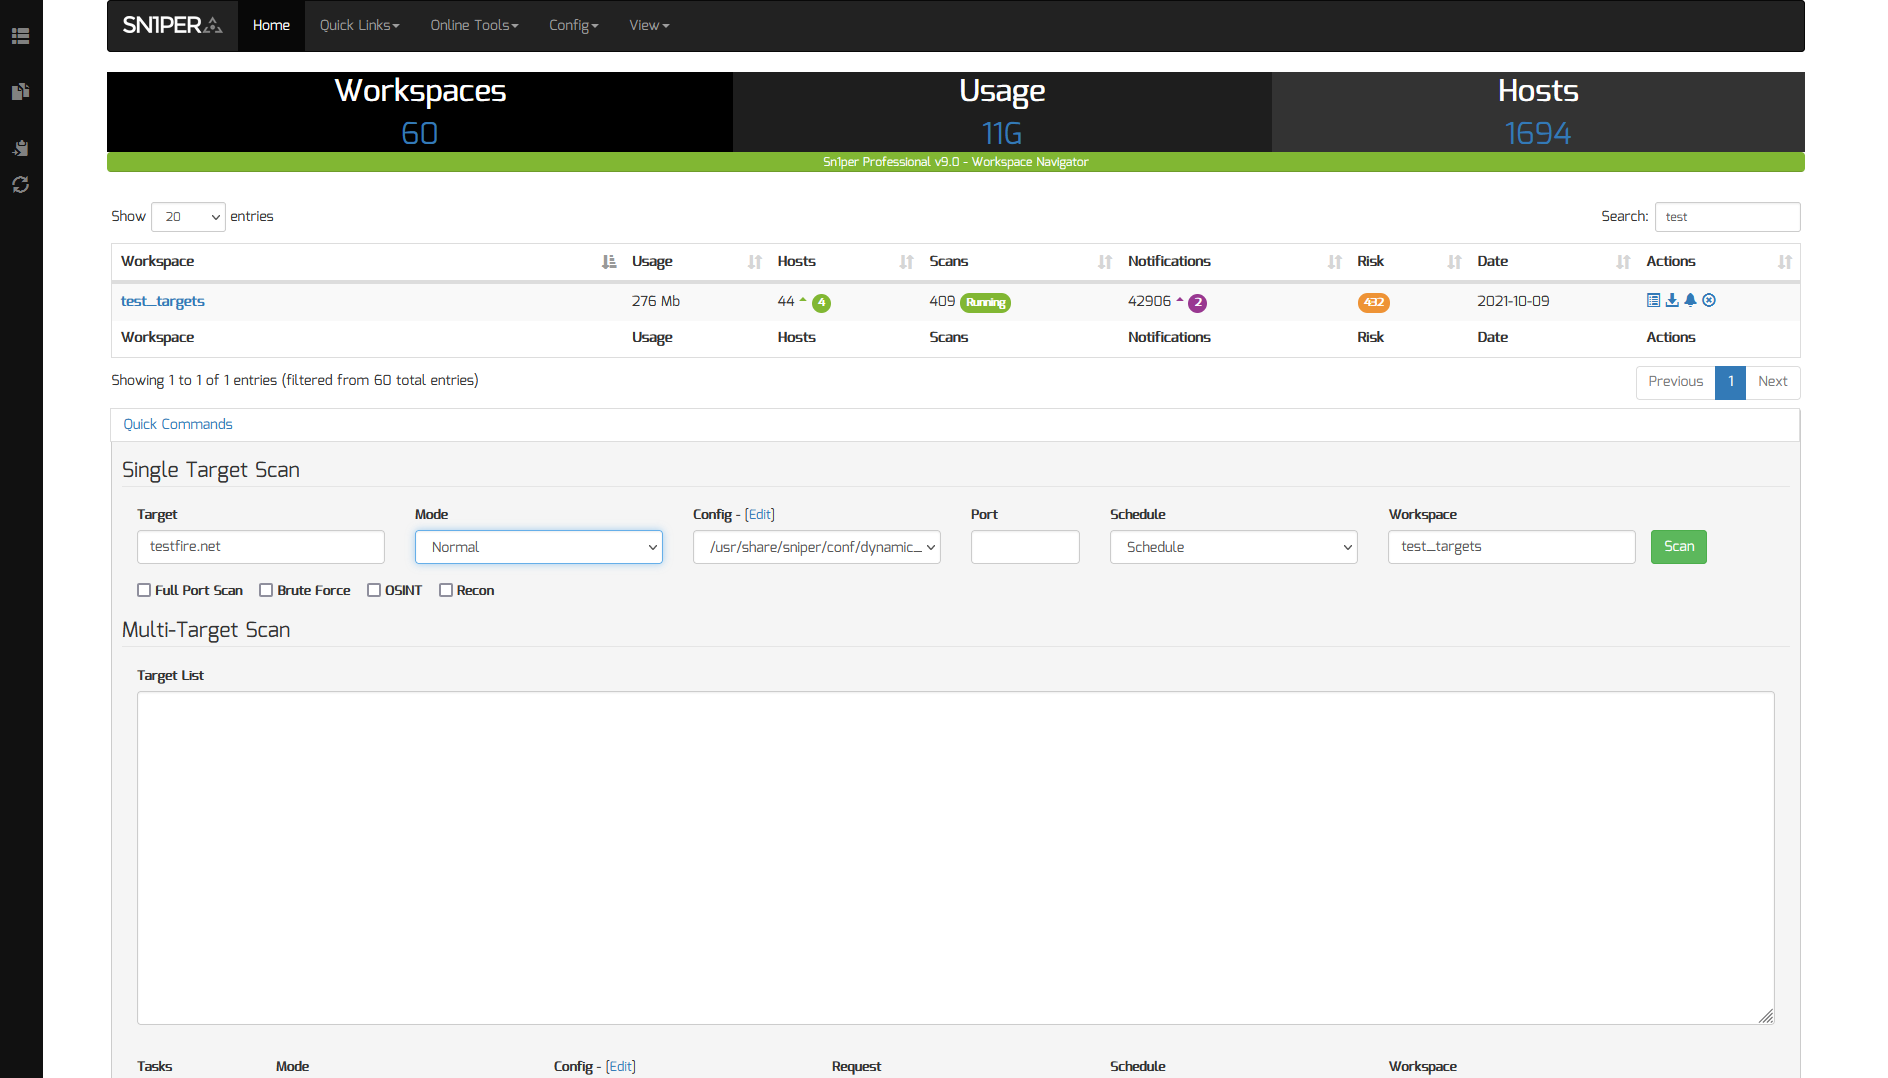
Clicking the “Scan” button will open a new scan window where we can monitor our progress and view the results in real time.
Analyzing The Results
Once the scan is complete, we can then view the results by clicking on the workspace from the workspace navigator and selecting the host we scanned from the host table.
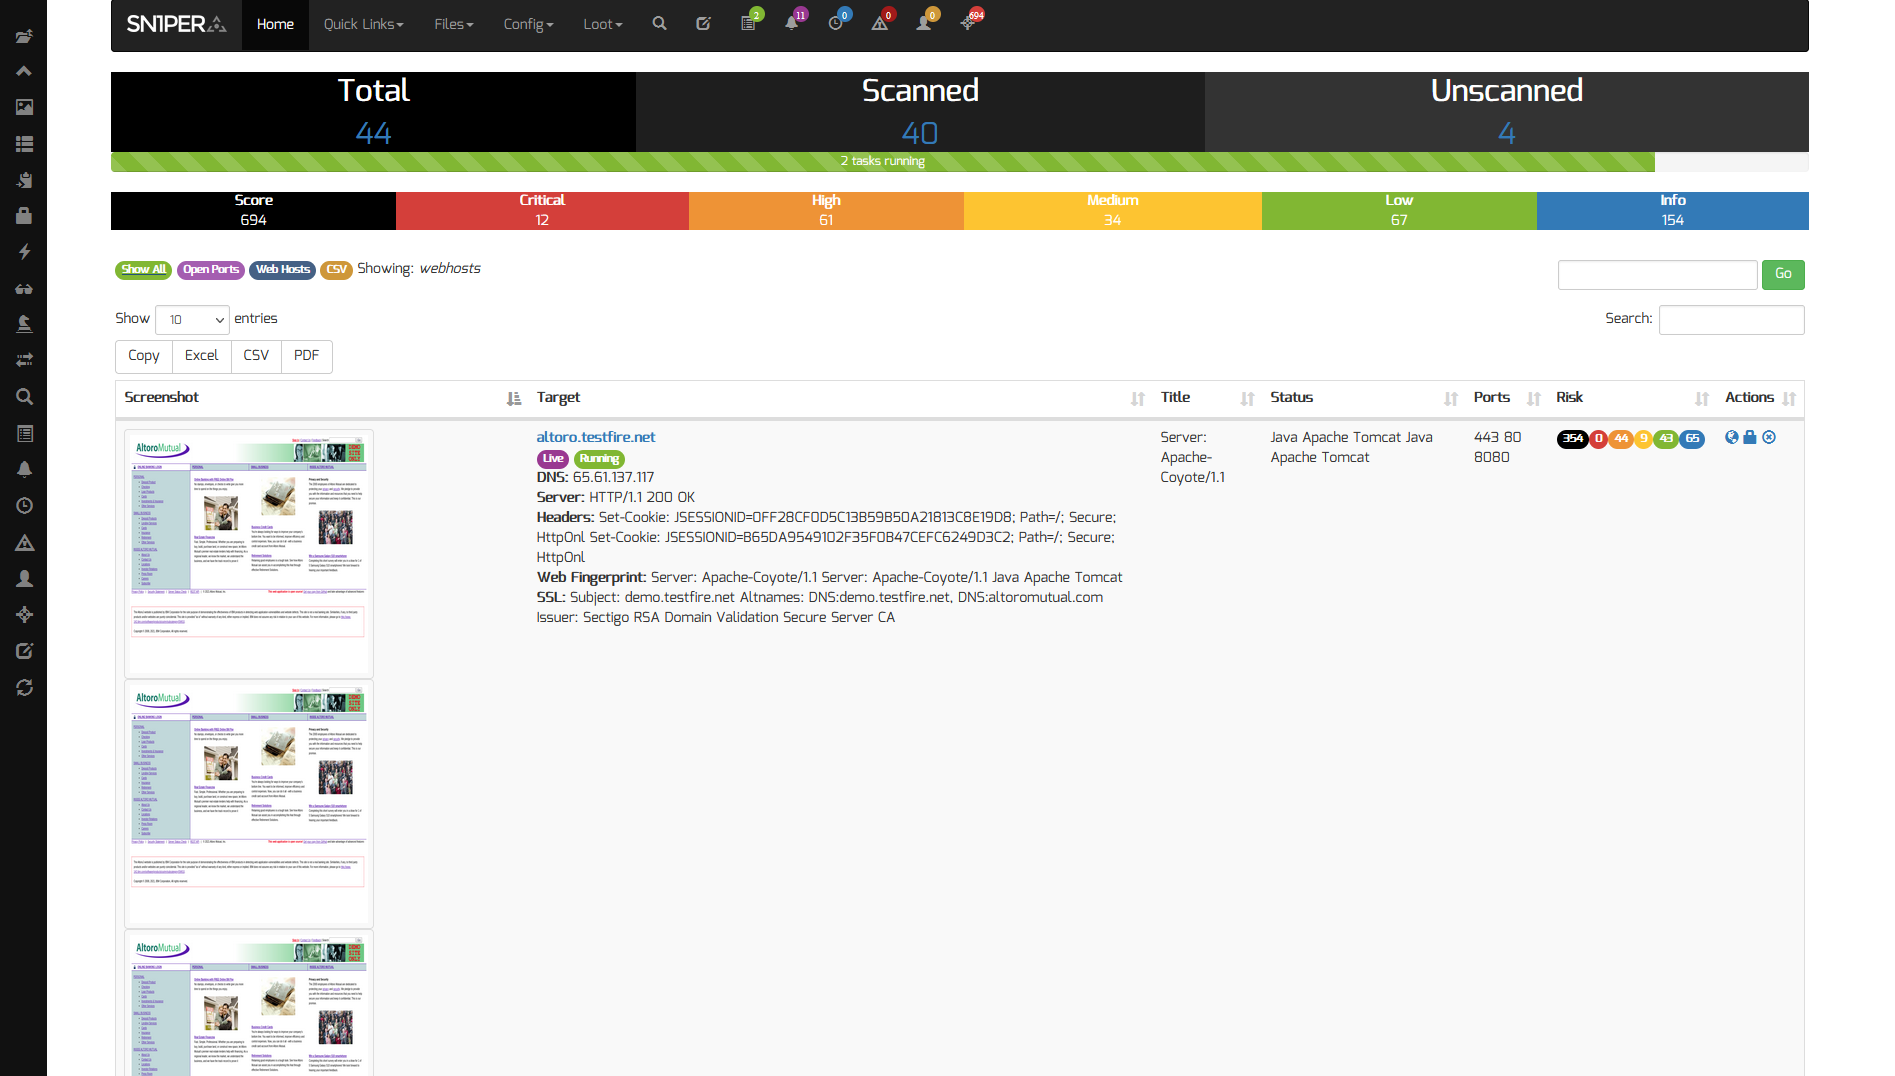
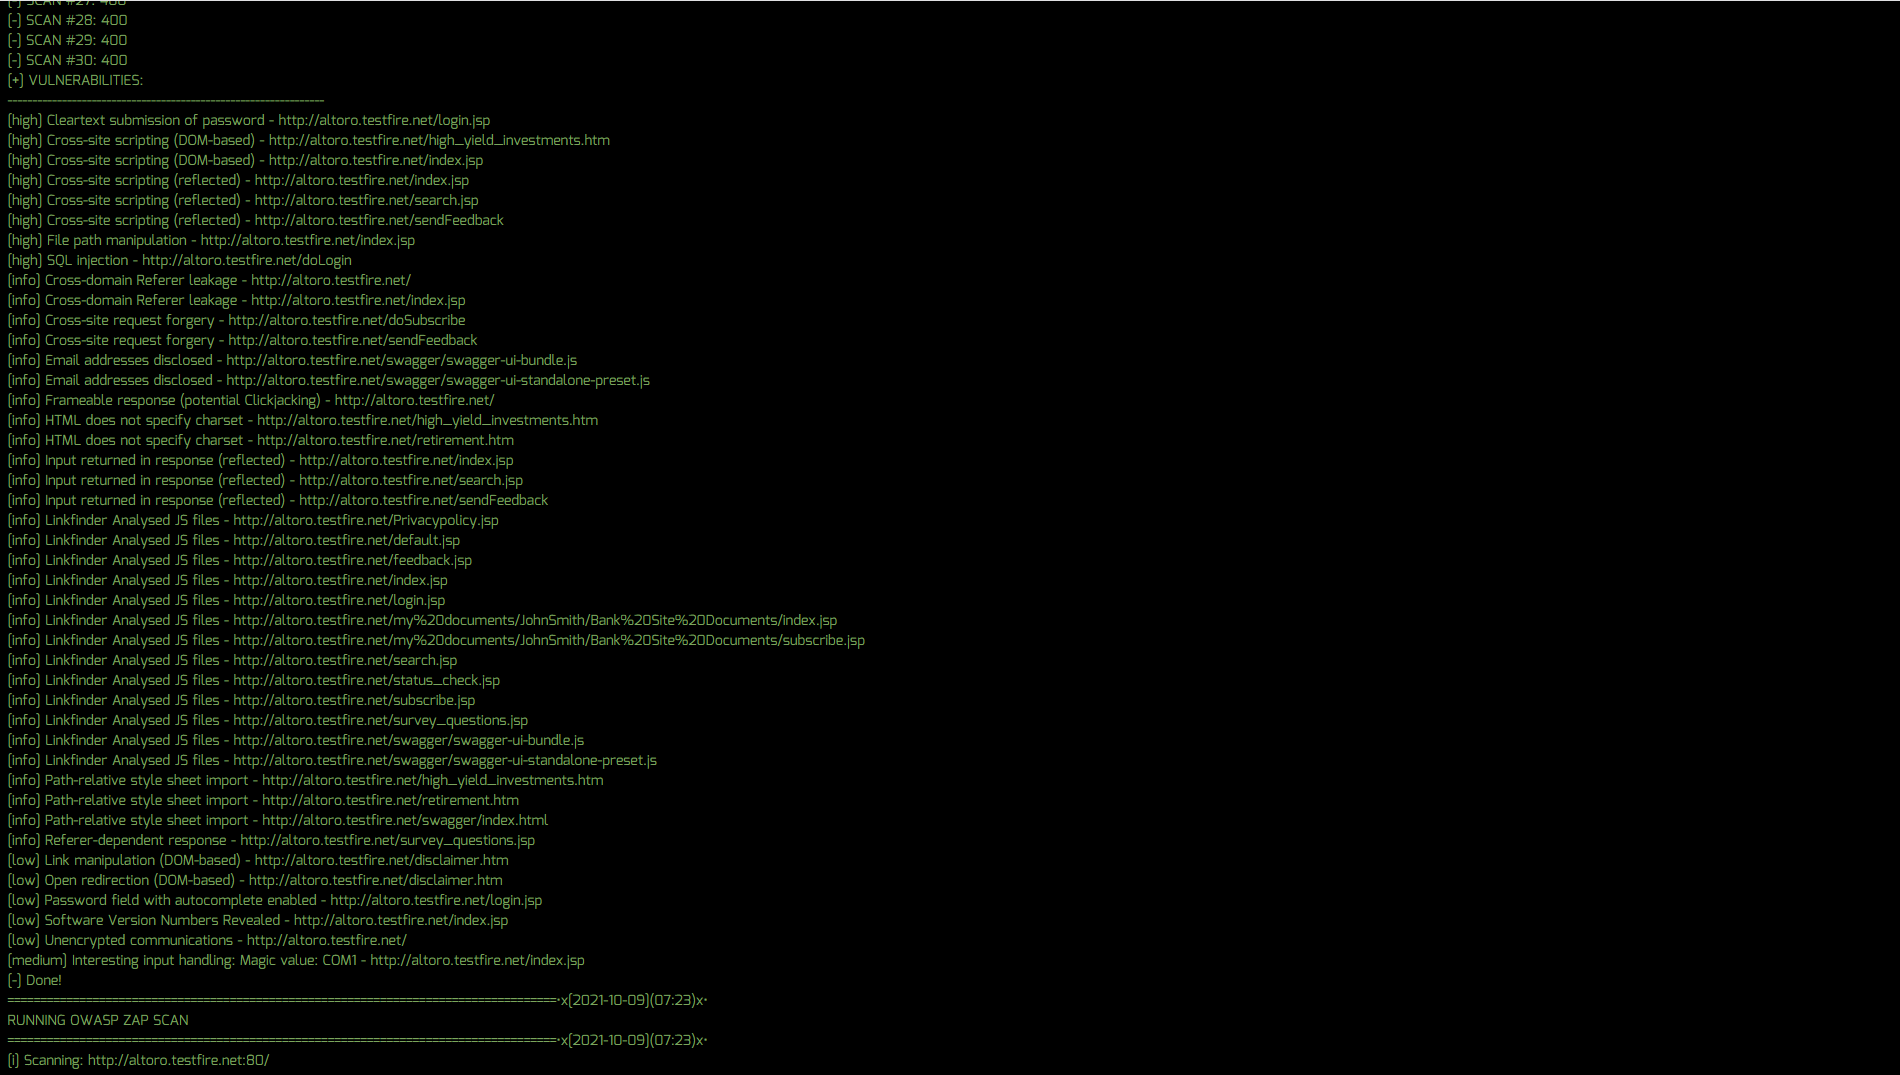
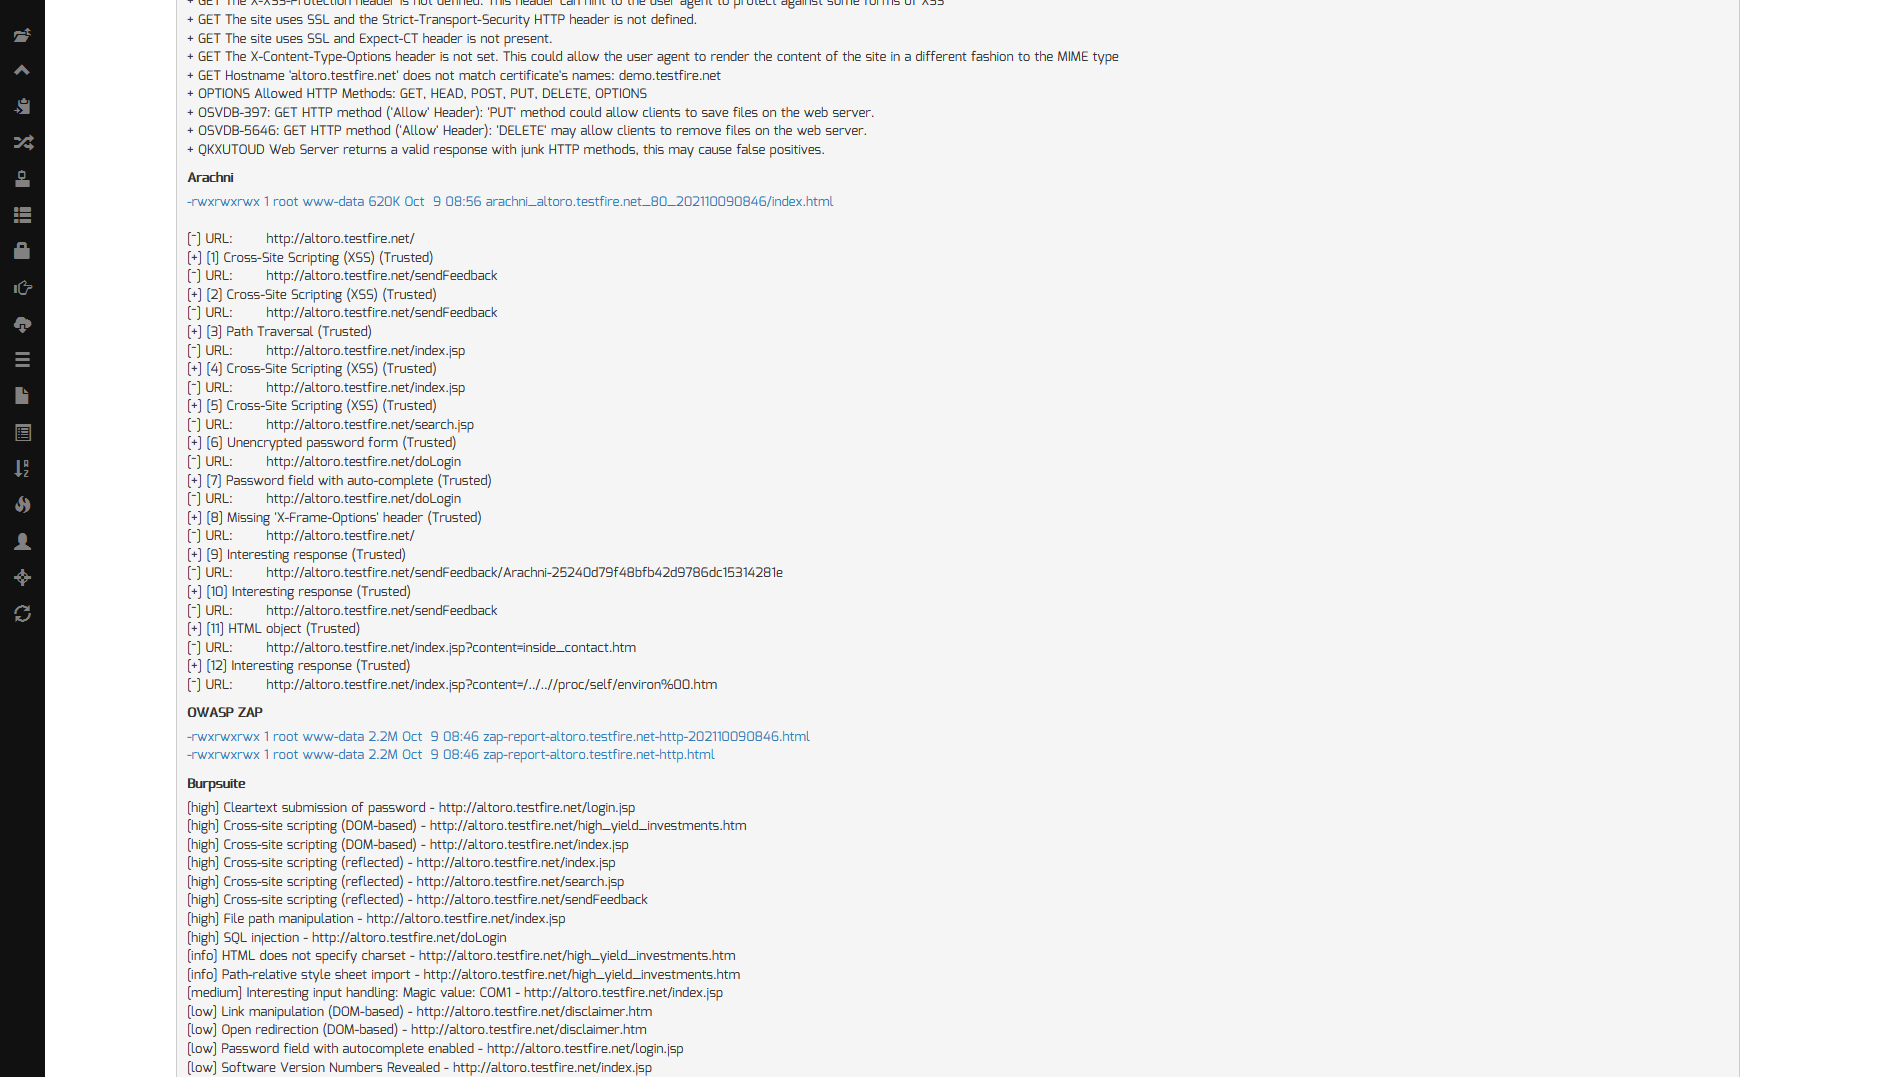
Next, to view our results, we can scroll down to the “Web Application Scans” section of the host report to view our results from Nikto, Arachni, OWASP ZAP and Burpsuite.
Automate Dynamic Application Security Testing (DAST) Using Sn1per Professional
We can also view, export and print all vulnerabilities using the vulnerability report viewer in Sn1per Professional.
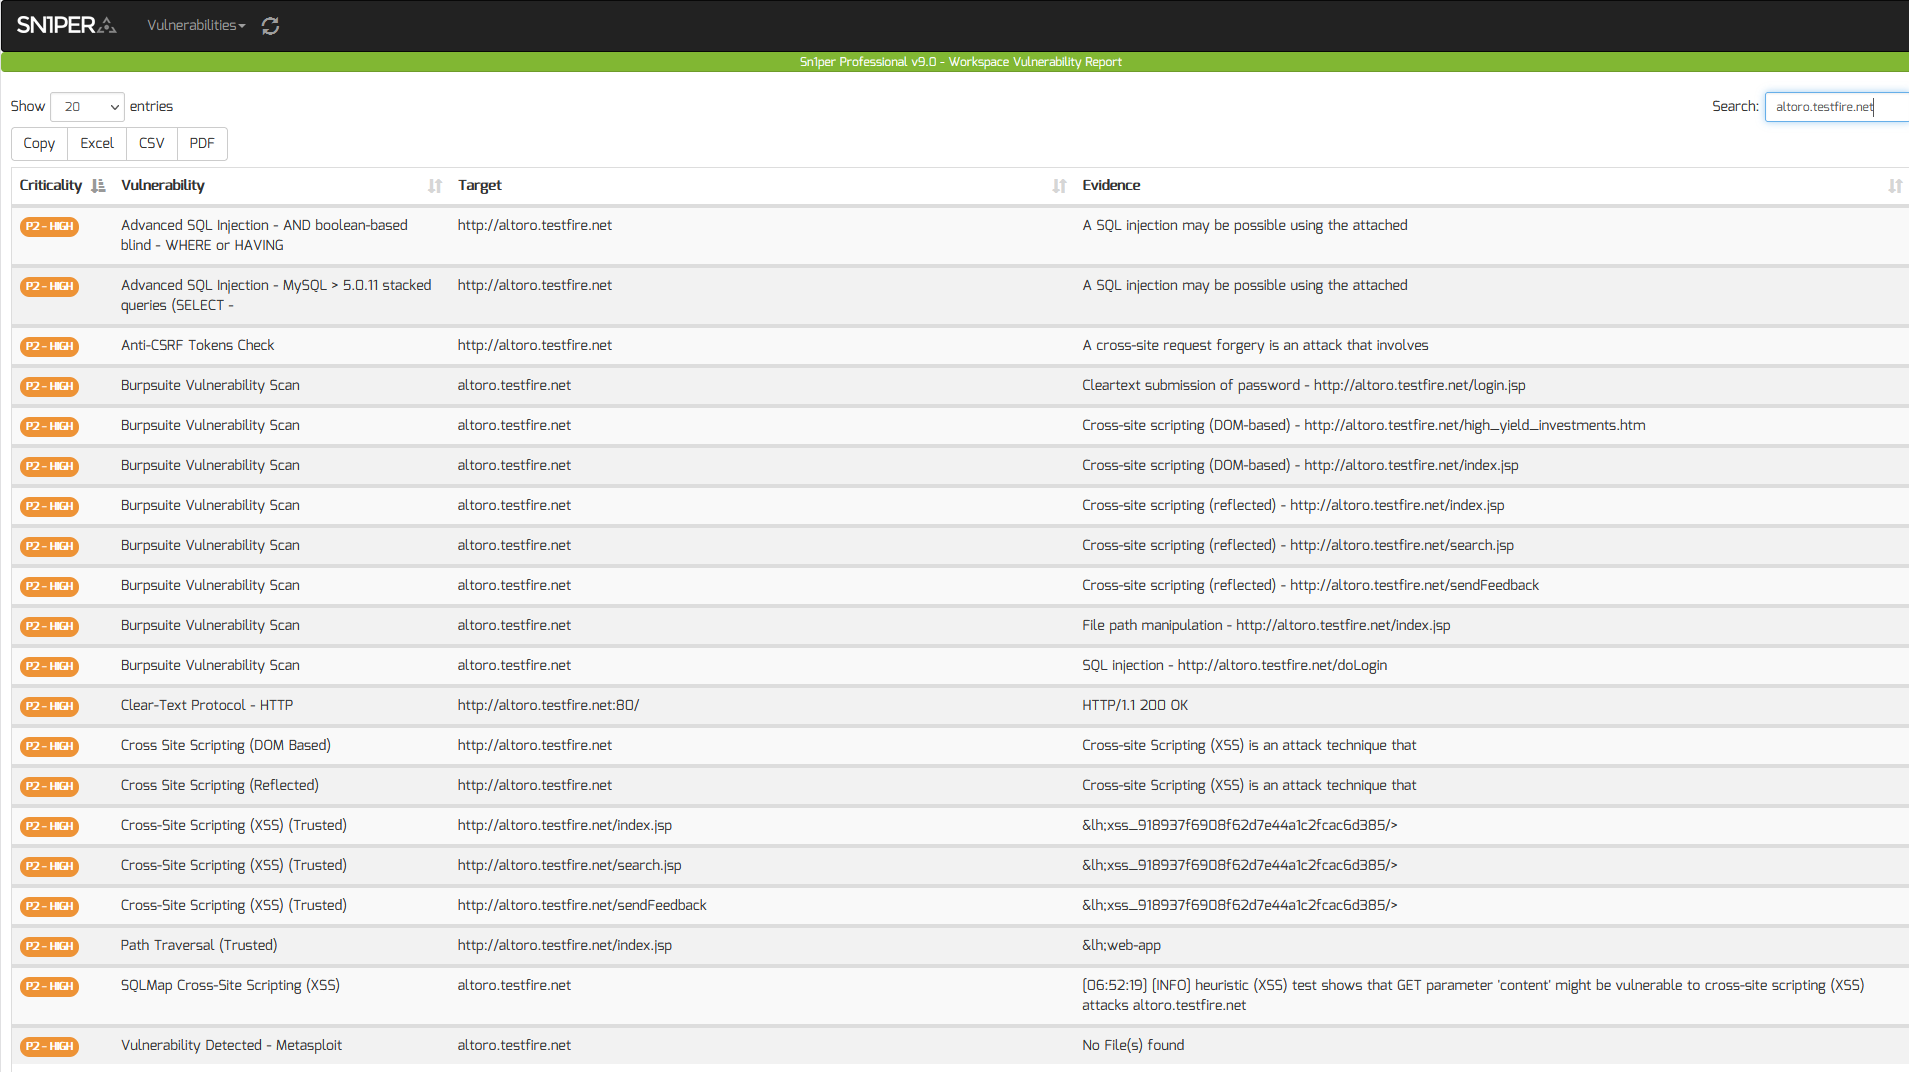
Automate Dynamic Application Security Testing (DAST) Using Sn1per Professional
Demo
For more information on Sn1per Professional, be sure to check our demo video here: