

Almost every attack surface management tool points outward. It starts from your domain, walks your subdomains, and maps the internet-facing assets an attacker sees from the public internet. That external view matters – but it is only half the picture. The other half lives inside your perimeter: the live hosts, open ports, running services, and connected devices scattered across your internal subnets. That is your internal attack surface, and for most teams it is the blind spot.
Network and subnet discovery is how you light it up. Point a discovery engine at an internal range like 10.0.0.0/24 and it finds every device that answers, catalogs the services each one exposes, and builds an inventory you can actually defend. This guide is the written companion to our Sn1per Professional 2026 network and subnet discovery demo. It defines the discipline, shows exactly how Sn1per discovers a subnet, walks the command-line and self-hosted web-dashboard workflows, and explains why this particular job should never leave your own infrastructure.
📌 Table of contents
- What is network and subnet discovery?
- Why your internal attack surface is the blind spot
- How Sn1per discovers a subnet
- Running network and subnet discovery from the CLI
- Seeing your internal estate in the self-hosted dashboard
- Sn1per vs a stitched open-source stack
- Automating and scheduling internal discovery
- Why internal discovery has to stay on-prem
- Getting started
- Frequently asked questions
What is network and subnet discovery?
Network discovery is the process of finding the live hosts on a network and identifying what each one is running. Subnet discovery is the same job scoped to a subnet – a contiguous block of addresses written in CIDR notation, such as 10.0.0.0/24 (256 addresses) or 172.16.0.0/16 (65,536 addresses). You give the tool a range, and it works out which addresses are actually in use, then fingerprints the services behind them.
A useful way to frame it is internal versus external. The industry increasingly splits attack surface management into two lanes:
- External attack surface management (EASM) looks inward from the public internet: domains, subdomains, certificates, and internet-facing IPs. That is the subject of our red team attack surface management and on-prem EASM guides.
- Internal or cyber-asset attack surface management (CAASM) looks outward from inside your network: the workstations, servers, printers, hypervisors, appliances, and unmanaged devices living on your private subnets. Network and subnet discovery is the engine that populates it.
Both lanes answer the same underlying question – what do I actually have, and which of it is exposed – but they start from opposite ends. Discovery is always the first step, because you cannot assess, prioritize, or defend an asset you do not know exists.
Why your internal attack surface is the blind spot
Internal networks drift. Someone stands up a test box on a Friday and forgets it. A contractor plugs in a laptop. A forgotten appliance keeps running an unpatched service years after the project that needed it ended. Private address space makes this worse, not better: a single 10.0.0.0/8 range holds more than sixteen million addresses, so real hosts sit sparsely scattered across an enormous space that no one maps by hand.
That drift is exactly what an attacker exploits after the first foothold. External defenses assume the perimeter holds; once it does not, the internal network is where lateral movement happens – and it is usually far softer than the edge. Shadow IT, default credentials on a management interface, an exposed database port, a legacy service nobody remembered: these are the internal-surface findings that turn a single compromised host into a domain-wide incident.
The reason this stays a blind spot is tooling. Point tools like Advanced IP Scanner, Angry IP Scanner, or a hand-run nmap sweep will tell you which addresses are alive, but they stop at a flat list. They do not follow up each host with a real service and vulnerability assessment, they do not deduplicate across ranges, and they do not build a durable, queryable inventory you can watch over time. Discovery that stops at “here are the live IPs” is a starting point, not attack surface management.
How Sn1per discovers a subnet
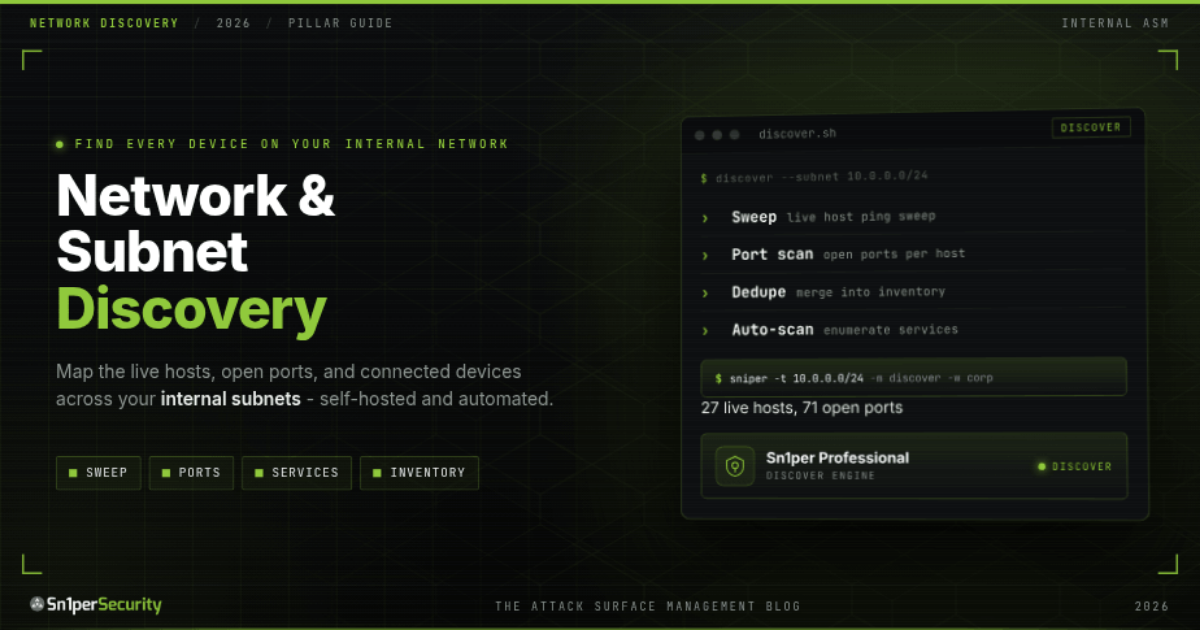
Sn1per Professional 2026 treats a subnet as a first-class target. Hand it a CIDR range and its discover mode runs a fast, purpose-built pipeline rather than a slow full-port scan of every address:
- Live-host sweep. A ping sweep across the range identifies which addresses are actually up, so the expensive work only happens on hosts that exist.
- Port and service scan. Every live host is scanned against a curated set of common TCP and UDP service ports – the ports that carry real services (web, SMB, RDP, databases, DNS, SNMP, and the rest) – instead of all 65,535. That is what keeps subnet discovery fast.
- Merge and deduplicate. The results from both passes are merged into a single, deduplicated target list for the subnet, so you get one clean inventory rather than overlapping fragments.
- Auto-scan every discovered host. This is the step point tools skip. Sn1per then launches a follow-up scan against each discovered host automatically – several in parallel – to enumerate service versions, fingerprint web technologies, capture screenshots, and surface vulnerabilities.
The honest scope of what discovery gives you: live hosts, their open TCP and UDP ports, the services running on those ports, and, from the per-host follow-up, service versions and web technologies. It is fingerprinting the reachable service surface of each device, which is exactly the internal attack surface you need to manage. One command turns a raw address range into a scanned, prioritized inventory.
Running network and subnet discovery from the CLI
The command line is the fastest way to kick off a discovery run. Every scan writes into a named workspace (-w), which keeps a given environment – a site, a data center, a client – cleanly separated.
Discover every live host on an internal /24 and auto-scan each one:
# Sweep a subnet, then automatically scan every device found
sniper -t 10.0.0.0/24 -m discover -w corp
Sn1per recognizes a CIDR target on its own, so a bare range switches into discovery mode without you naming it:
# A bare CIDR auto-detects as a subnet and switches to discover mode
sniper -t 192.168.1.0/24 -w corp
Most real environments are more than one range. Drop your internal ranges into a file and run a mass discovery pass across all of them:
# internal-ranges.txt holds one CIDR (or host) per line
sniper -f internal-ranges.txt -m massdiscover -w corp
A discovery run distills a noisy address range into a short, actionable summary – live hosts, the services they expose, and the issues worth acting on first:
[*] Subnet ................. 10.0.0.0/24
[*] Live hosts ............. 27
[*] Open service ports ..... 71
[*] Services fingerprinted . 63
[*] Findings to review ..... 9
      - 10.0.0.14   MSSQL 1433 exposed            HIGH
      - 10.0.0.31   RDP 3389 open to the subnet   HIGH
      - 10.0.0.52   default admin panel (HTTP)    MEDIUM
      - 10.0.0.88   legacy SMBv1 service          MEDIUM
Because everything lands in the workspace, you can pull the results straight into your own systems through the self-hosted JSON API instead of copying from a report:
# Pull validated findings for the workspace via the local JSON API
curl -sk -H "X-API-Key: $SN1PER_API_KEY"
  "https://localhost:1337/api.php?action=vulnerabilities&workspace=corp"
If you want the underlying host-discovery techniques in more depth – ARP sweeps, ICMP behavior, and TCP probe choices – our active reconnaissance guide covers where host discovery sits in the wider reconnaissance methodology.
Seeing your internal estate in the self-hosted dashboard
The CLI writes the workspace; the Sn1per Professional 2026 web UI reads it. Same data, on your own hardware, no cloud in between. Three views turn a discovery run into something a team can work from:
- Workspace Navigator is the estate-level view: how many workspaces you have, the total host count across them, aggregate risk, and how much loot each has collected. This is your “how big is my internal footprint” dashboard.
- Workspace Report drills into one environment with tabs for OSINT, Technologies, Endpoints, Vulnerabilities, Scan Tasks, and Scheduled Tasks. The Scan Tasks tab shows a discovery job and its auto-spawned per-host scans running live, with history, so you can watch a subnet sweep populate in real time.
- Host Report is the per-device page: target, a risk-score gauge, total findings, open-port count, and drawers for open ports and services, screenshots, DNS, detected technologies, and any credentials found. Every discovered device gets one.
The Technologies view is the one that reads most like an IT asset inventory: it aggregates the software, frameworks, servers, and services detected across the whole workspace, with counts of unique technologies and the most common ones. That is where forgotten and out-of-policy assets tend to surface – the box running the version nobody patched.
Sn1per vs a stitched open-source stack
You can assemble internal discovery from open-source parts, and plenty of teams do. Nmap and Masscan sweep and port-scan, netdiscover and arp-scan handle local subnets, and something like Faraday or reNgine aggregates the output. Those tools are excellent and Sn1per builds on the same lineage. The difference is not the discovery itself – it is everything after it: the follow-up scan, the deduplication, the inventory, the dashboard, and the schedule. With a stitched stack, you own that integration glue. With Sn1per, it is one engine.
| Capability | Stitched OSS stack (Nmap + Masscan + netdiscover + your glue) | Sn1per Professional 2026 |
|---|---|---|
| Subnet live-host sweep | Yes (nmap -sn / arp-scan) | Built in |
| Port and service enumeration | Yes (nmap / masscan) | Built in, curated fast port set |
| Auto follow-up scan per host | You script it | Automatic, several hosts in parallel |
| Deduplicated target list | You build it | Automatic |
| Web dashboard and asset inventory | Add Faraday or reNgine yourself | Workspace Navigator and Host Reports |
| Technology fingerprinting | Add whatweb / httpx | Built-in Technologies view |
| Scheduled and continuous runs | You cron it | Built-in scheduled tasks |
| Self-hosted and on-prem | Yes | Yes, one Docker command |
| Reporting and JSON API | You assemble it | Built-in reports and JSON API v1.0 |
| Setup effort | High – you own the integration | Low – one engine |
If your priority is a fully self-hosted internal discovery pipeline and you have the time to wire the pieces together, the open-source route is legitimate. If you would rather point one tool at a subnet and get a scanned, deduplicated, browsable inventory, that is the gap Sn1per fills.
Automating and scheduling internal discovery
A one-time subnet sweep is a snapshot, and internal networks do not hold still. The device that gets you breached is often the one that appeared after your last scan – a new host, a freshly opened port, a service that drifted out of policy. The answer is to run discovery on a schedule rather than by hand.
Sn1per Professional 2026 supports scheduled tasks, so a discovery run against your internal ranges can repeat nightly or weekly and keep the inventory current without anyone remembering to launch it. Watching those recurring runs for new hosts and newly exposed services turns network discovery into a continuous penetration testing program for the inside of your network – the internal counterpart to the continuous attack surface testing you run on the edge. For a broader look at doing this without a human driving every step, see our automated penetration testing guide and the companion roundup of automated pentest tools.
Why internal discovery has to stay on-prem
Think about what a network and subnet discovery run actually produces: a complete map of the live hosts, open ports, and soft spots inside your network. That inventory is a blueprint of exactly where an attacker would go after breaking in. It is the last thing you want sitting in a third-party cloud, in a multi-tenant database, backed up and indexed outside your control. If that vendor is breached, your internal blueprint goes with them.
This is why internal discovery is the strongest case for self-hosting there is. Sn1per runs entirely on your own infrastructure – one Docker command to deploy, and every byte of discovery data stays inside your perimeter. Nothing about your internal network leaves the box. For regulated environments, air-gapped networks, and anyone who simply refuses to ship a map of their weak points off-site, that is the whole point. We make the broader case in on-prem vs cloud attack surface management and the roundup of open-source and self-hosted ASM tools.
Getting started
Which edition you need depends on how much you are discovering and how many people are doing it:
- Sn1per Community Edition is the free, open-source scan engine – the right place to try discovery mode against a lab subnet from the command line.
- Sn1per Professional 2026 adds the self-hosted web dashboard, the Workspace Navigator, Host Reports, scheduled tasks, and the JSON API. It is built for a single operator managing up to roughly 150 assets – the sweet spot for one team mapping its internal network.
- Sn1per Enterprise scales to nearly unlimited assets with multiple operators and multiple workspaces, for organizations discovering across many sites at once.
See the shop for current editions and pricing, and start your first discovery run against a subnet you own. You cannot defend what you have not found – discovery is where that changes.
Frequently asked questions
What is network and subnet discovery?
Network and subnet discovery is the process of finding the live hosts on a network – scoped to a subnet written in CIDR notation such as 10.0.0.0/24 – and identifying the open ports and services each host exposes. It is the first step of managing an internal attack surface, because you cannot assess or defend a device you do not know exists.
How is internal network discovery different from external attack surface management?
External attack surface management (EASM) looks inward from the public internet at domains, subdomains, and internet-facing assets. Internal network discovery looks outward from inside your network at the hosts, ports, services, and connected devices on your private subnets. Both start with discovery, but they map opposite sides of the perimeter, and the internal side is usually the bigger blind spot.
What does Sn1per’s discover mode actually find?
Discover mode finds the live hosts on a subnet, their open TCP and UDP service ports, and the services running on those ports. It then auto-scans each discovered host to enumerate service versions, fingerprint web technologies, capture screenshots, and surface vulnerabilities. The result is a scanned, deduplicated inventory of your internal attack surface rather than a flat list of live IP addresses.
Can I run internal discovery from both the command line and a web dashboard?
Yes. In Sn1per Professional 2026 the CLI launches a discovery run into a named workspace, and the self-hosted web dashboard reads that same workspace. You get the Workspace Navigator for the estate view, a Workspace Report per environment with a live Scan Tasks tab, and a Host Report for every device found. Same data, run from the CLI or browsed in the UI.
Is Sn1per’s network discovery self-hosted, and does my internal asset data leave my network?
Sn1per is fully self-hosted. It deploys with one Docker command and runs entirely on your own infrastructure, so the complete map of your internal hosts, ports, and weak points stays inside your perimeter. No discovery data is sent to a vendor cloud, which makes it a fit for regulated and air-gapped environments.